Tagging Objects
When you tag objects, you can tag them individually or in bulk. Bulk tagging is useful if you want to assign the same tag to several similar objects (such as switches).
Only alphanumeric characters, spaces, and underscores ( _ ) are allowed in tags. Multiple tags are separated by a comma.
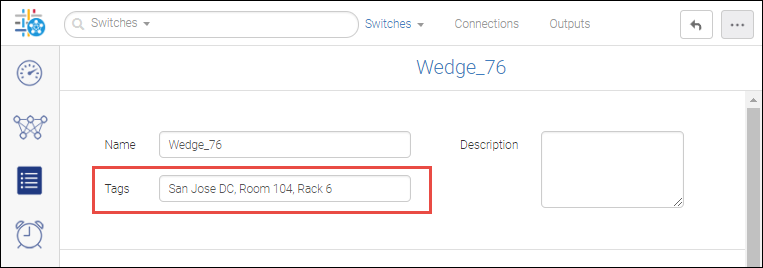
Almost every detail page has a Tags field, where you can enter and edit the tags for that object. The following switch has three tags, indicating the data center, room number, and rack number of the switch.
On the inventory page, you can tag multiple objects at the same time, using the bulk edit option, as shown in the following procedure.
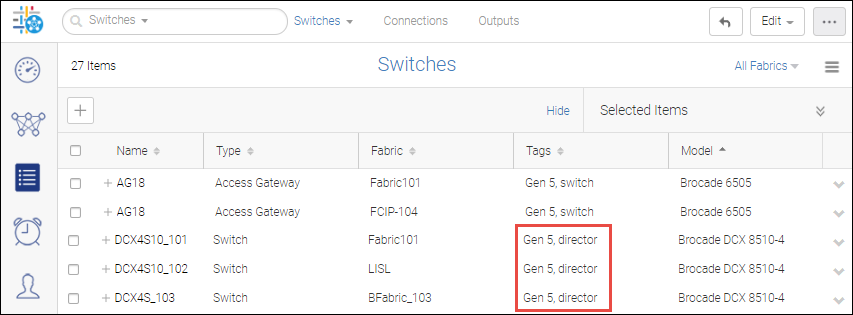
The following example tags all Gen 5 switches as "Gen 5". In addition, the example tags directors and switches as "director" and "switch" respectively.
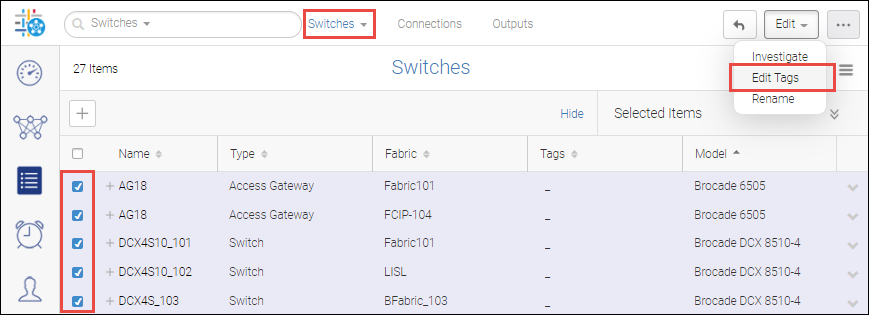
1. Click the Inventory icon (  ), and then select the type of entity you want to tag.
), and then select the type of entity you want to tag.For this example, select Switches from the drop-down list.
2. Click the More button ( ) in the top right corner of the page, and select Bulk Edit.
) in the top right corner of the page, and select Bulk Edit.For this example, it is helpful to next click the Model column to sort the switch inventory list by model.
3. Select the items that you want to tag, click the Edit drop-down, and click Edit Tags.
For this example, select the Gen 5 switches and directors.
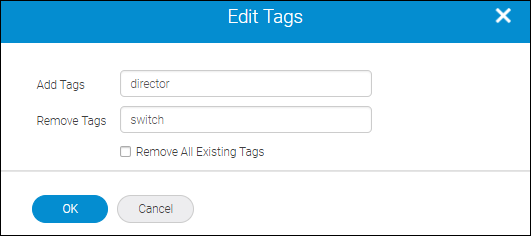
4. In the Edit Tags dialog, enter the tags in the Add Tags field, and click OK.
For this example, enter two tags, separated by a comma: Gen 5,switch.

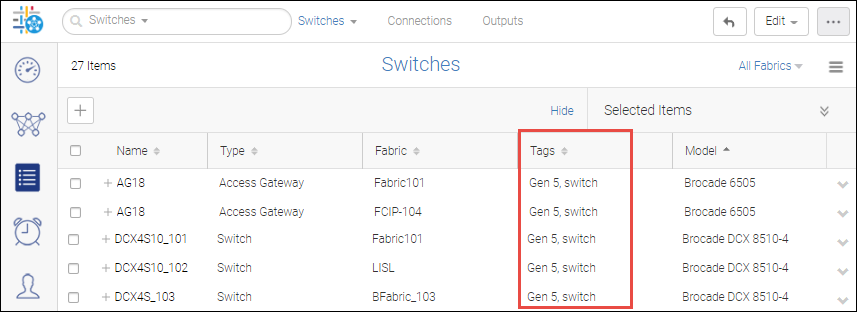
The tags are added to the Tags column in the inventory page.
Note that in this example, all switches are tagged with "Gen 5" and "switch"; however, the directors should be tagged with "director" instead of "switch". The following steps show how you can edit and remove tags.
5. To edit or remove tags, select the items that you want to edit, click the Edit drop-down, and click Edit Tags.
For this example, select the directors, so that you can remove the "switch" tag and replace it with a "director" tag.
6. In the Edit Tags dialog, enter the tags that you want to add in the Add Tags field, enter the tags that you want to remove in the Remove Tags field, and click OK.
For this example, add the tag "director" and remove the tag "switch".
Note that you cannot modify an existing tag in place. You must add the modified tag and remove the old tag.
To remove all tags from the selected items, select the Remove All Existing Tags check box.
7. Click OK.
The inventory list displays the updated tags.
Parent topic