Configuring a Backbone Fabric
To create a new backbone fabric, follow the instructions below.
1. Click the Settings icon (  ), and then select > .
), and then select > .2. Click the + icon on the top right corner of the window and select a fabric you require to be added as a backbone.
Note: You can select only one fabric at a time. Fabrics having at least one platform with Integrated Routing License will be listed.
3. Click OK to configure the selected fabric as the backbone.
4. Enter the Backbone Fabric ID.
Note: For Virtual Fabric, the base fabric ID is reflected as a backbone fabric ID and cannot be modified.
For Non-Virtual Fabric, if the switches do not contain a fabric ID, you should enter the backbone fabric ID. In case of switches with fabric ID, you can select any fabric ID from the drop-down.
The Backbone fabric ID ranges from a minimum of 1 to a maximum 128.
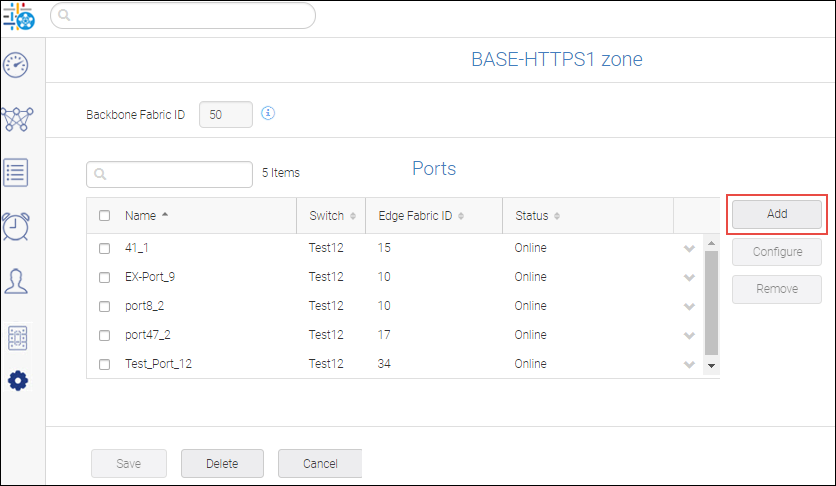
5. Add ports to the backbone fabric.
a. Click Add to select the switches in the fabric.
b. Checking Show Integrated Routing/Integrated Port On Demand Licenses displays only the switches for which you can configure EX_Ports.
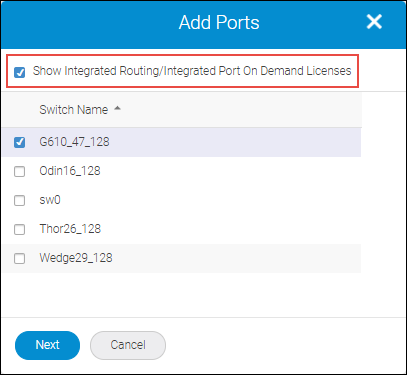
Note: If you uncheck Show Integrated Routing/Integrated Port On Demand Licenses the switches that do not have Integrated Routing Licenses are also displayed.
c. Select the switch and click Next to list all the ports.
Note: For Fabric OS 8.1.0 or later versions, you can select a maximum of 16 switches.
For below Fabric OS 8.1.0 versions, you can select a maximum of 12 switches.
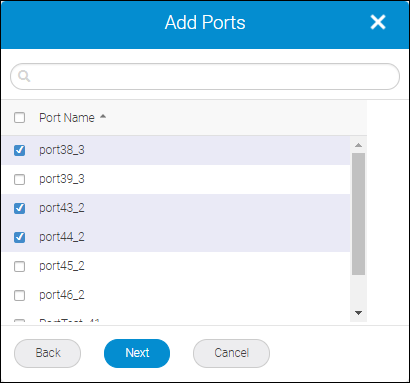
d. Select the ports and click Next to configure the ports as EX_Ports.
Note: SANnav does not support ports with FCIP or Ethernet protocol to configure VEX_Ports.
Note: The ports already configured as EX_Ports are not listed.
When configuring EX_Ports, ensure that the edge fabric ID is consistent for all EX_Ports that connect to the same edge fabric.
Ensure that the ports to be configured as EX_Ports are not connected.
e. Enter the edge ID in the Edge Fabric ID field.
f. Enter the virtual switch ID for the edge fabric in the Front Domain ID field.
Fill in the port properties in Add Ports window.
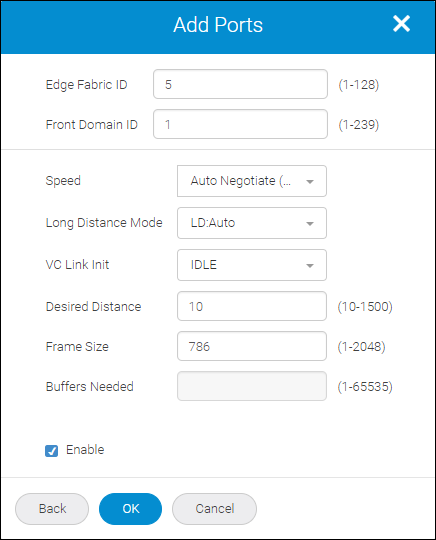
g. Select the Enable check box to access the specified port.
Note: If the enable box is not selected, the EX_Port will be configured but it will be in a disabled state.
h. Click OK to list the ports in the fabric window.
6. Click Save to configure the backbone fabric.
Click OK in the confirmation dialog box.
After you have clicked save SANnav performs the following operation:
◦ In case of non VF, the backbone fabric ID is configured on all switches in the fabric (for the switches with and without routing license)
◦ FC Routing service is enabled on all switches selected for EX_Port configuration (if FCR is not enabled already)
◦ Assign Edge Fabric ID and EX_Port configuration.
The new backbone fabric will take some time to reflect in the Fibre Channel Routing Management window.
You can view the progress in the Events tab.
Parent topic