Creating Offline Zones
You can create an offline zones and work on it later without disturbing the active zones.
Note: To create an offline zone, you must create an offline zone configuration, and then create the zone within the offline zone configuration.
To create an offline zone, follow the instructions below:
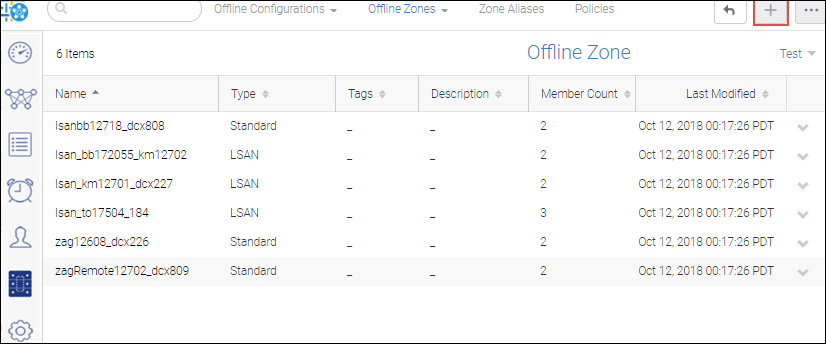
1. Click the Zoning icon (  ), and then select Offline Zones from the Zone Configuration drop-down.
2. Select an offline Zone DB and click OK to create a new offline zone configuration.
3. Click the + icon on the top right corner of the Offline Zone window.
4. Enter a name for the zone configuration, along with any tags and description.
5. To add an offline Standard Zone or LSAN Zone member, follow the below steps:
a. Select Standard Zone or LSAN Zone from the Zone Type drop-down.
b. Click Add in the Create New Zone window.
c. When you select Standard Zone as zone type you can select WWN or Domain, Port Index.
When you select LSAN Zone as zone type you can only add WWN as members.
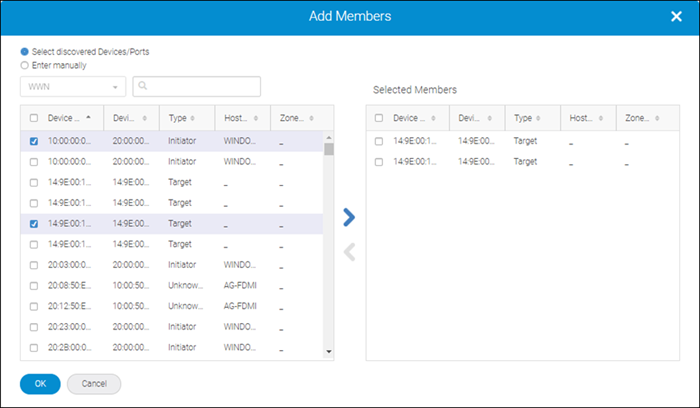
d. Select discovered members to include the discovered members in the zone, and click (  ) to move them to the Selected Members list.
You can also select Enter manually, and type the name of offline members.
6. To add an offline Peer Zone or LSAN Peer Zone member, follow the below steps:
a. Select Peer Zone or LSAN Peer Zone from the Zone Type drop-down.
b. Click Add in the Create New Zone window.
c. When you select Peer Zone as zone type you can select WWN or Domain, Port Index as members.
When you select LSAN Peer Zone as zone type you can only add WWN as members.
d. Select discovered members to include the discovered members in the zone, and click ( ) to move them to the Selected Members list.
You can also select Enter manually, and type the name of offline members.
e. Click (  ) to add the selected member as a principal member in the zone.
) to add the selected member as a principal member in the zone.The non-selected members will be present as the peer members of the principal member in the zone.

7. Click OK and then click Save.
Parent topic