Creating Standard Zones
Standard zones allow communication between all members in the zone.
To create a standard zone, follow the instructions below:
1. Click the Zoning icon (  ), and then select the Zones tab.
2. Select a fabric to create a zone and click OK.
3. Click the + icon on the top right corner of the window to create a standard zone.
4. Enter a name for the zone, along with any tags and description.
5. Select Standard Zone from the Zone Type drop-down.

6. Add members to the standard zone.
a. Click Add in the Create New Zone window.
b. Select the type of zone member from the drop-down list: WWN or Domain, Port Index or Alias.
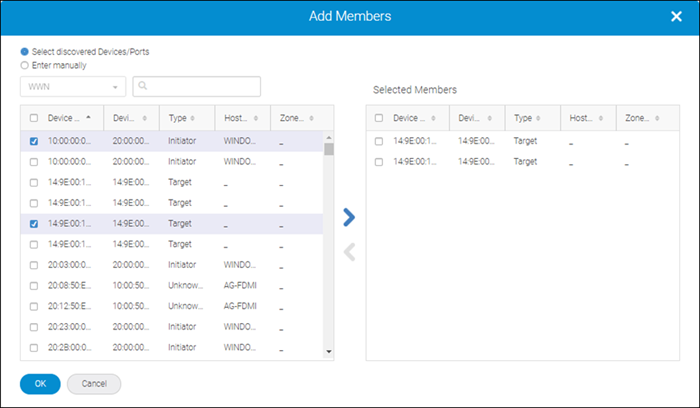
c. Select discovered members to include the discovered members in the zone, and click (  ) to move them to the Selected Members list.
d. You can also select Enter manually, and type the name of offline members.
7. Click OK and then click Save.
Parent topic