Adding Logical Switches to a Logical Fabric
To add a logical switch to a logical fabric, perform the following steps:
1. Click the Settings icon (  ), and then select > .
), and then select > .The Logical Fabrics window is displayed.
2. Click the logical fabric where you want to add the logical switch.
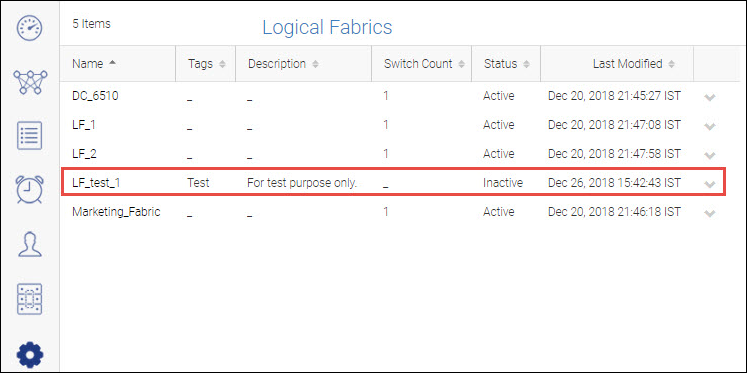
The selected logical fabric appears.
3. Click the Add button from the Logical Switches table. The Add button is enabled after you provide the fabric ID.
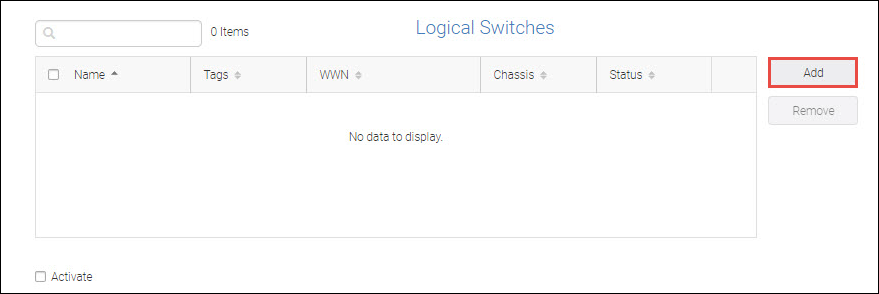
The Select Chassis window is displayed. The Select Chassis window displays all the Virtual Fabrics-capable switches. You can select one switch at a time to select the required ports to create logical switch. If the selected switch is not Virtual Fabrics-enabled, you can see the confirmation message upon enabling the Virtual Fabric after clicking the Save button. The Logical Switch Count field in the Select Chassis window displays the switch count per chassis.
Note: When you delete a logical switch, you must rediscover the operation on any of the fabrics to which the switch belongs. Otherwise, the count is updated in SANnav only during the next cyclic collection and takes more time to reflect.
4. Select the chassis to which the logical switch is added.
◦ The chassis is greyed out when it reaches the maximum logical switch count.
◦ The chassis does not appear under the following conditions:
▪ When the selected fabric ID is already present on the discovered logical fabric.
▪ When the base switch template is selected and you are trying to select a chassis where the base switch is already configured.
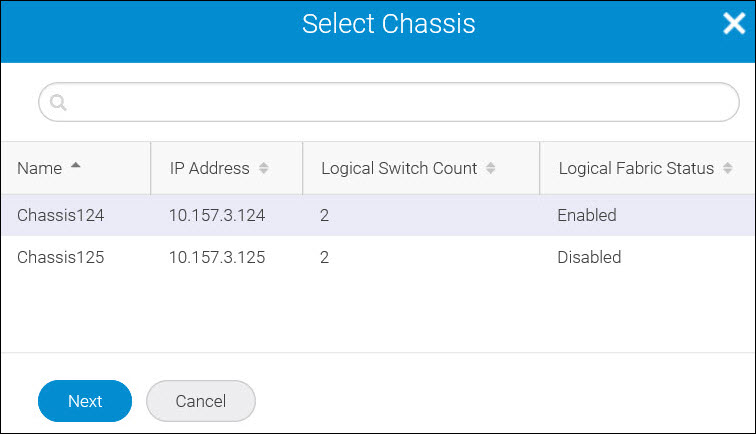
5. Click Next. The Add Logical Switch window appears.
6. Enter the logical switch name and the domain ID, and select at least one port to create the logical switch.
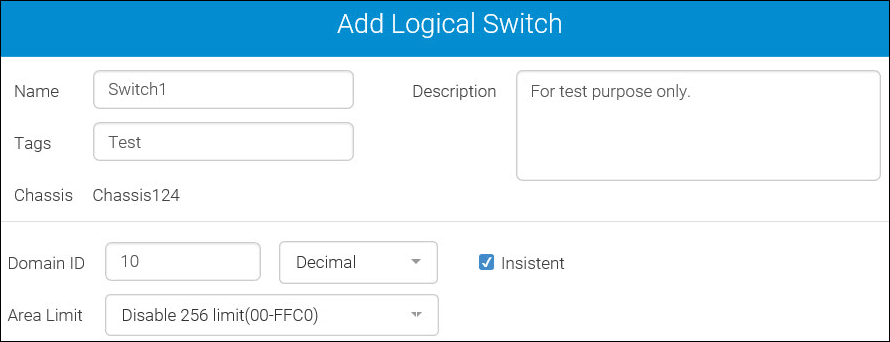
7. Select the Insistent checkbox to enable the insistent Domain ID.
Note: For FICON, the Insistent checkbox must be selected. If you select the Insistent checkbox and a duplicate domain ID exists, the switch segments from the fabric instead of changing the domain ID.
8. Select the required area limit from the Area Limit drop-down.
The options are as follows:
◦ Disable 256 limit (00 – FFC0)
This option enables 10-bit addressing. This addressing scheme supports a large number of F_Ports.
◦ Zero Based Assignment
Unique area assignments begin at zero regardless of where the port is physically located. When a port is assigned to a logical switch, the next free port identifier (PID) starting from 0x00 is assigned.
◦ Port Based Assignment
▪ Unique area assignments are based on the port index. This mode is compatible with domain-index zoning.
▪ This option is not supported on the default logical switch.
Note: If you are using the FICON template, by default, the Zero Based Assignment option is selected in the Area Limit field.
For detailed information on the area limit, refer to the Brocade Fabric OS Administration Guide.
9. To add the ports from the Available Ports list, select the ports that you want to add, and then click (  ) to move the ports to the Selected Ports list.
) to move the ports to the Selected Ports list.◦ Initially, all ports belong to the default logical switch. When you create additional logical switches, they are empty and you must assign ports to those logical switches.
◦ A given port can be used in only one logical switch. The ports that are not assigned to the newly created logical switch remain in the default switch.
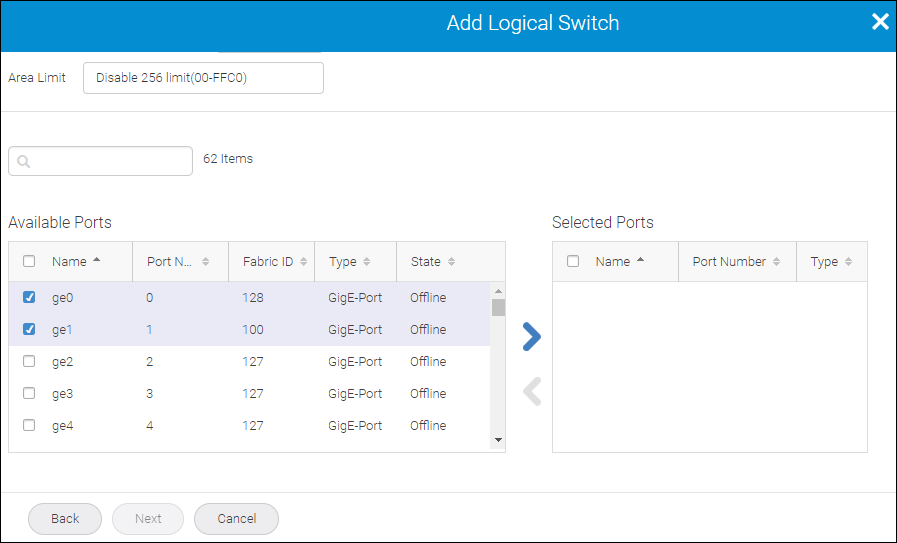
Note: When the ports are selected, ( ) is enabled.
) is enabled.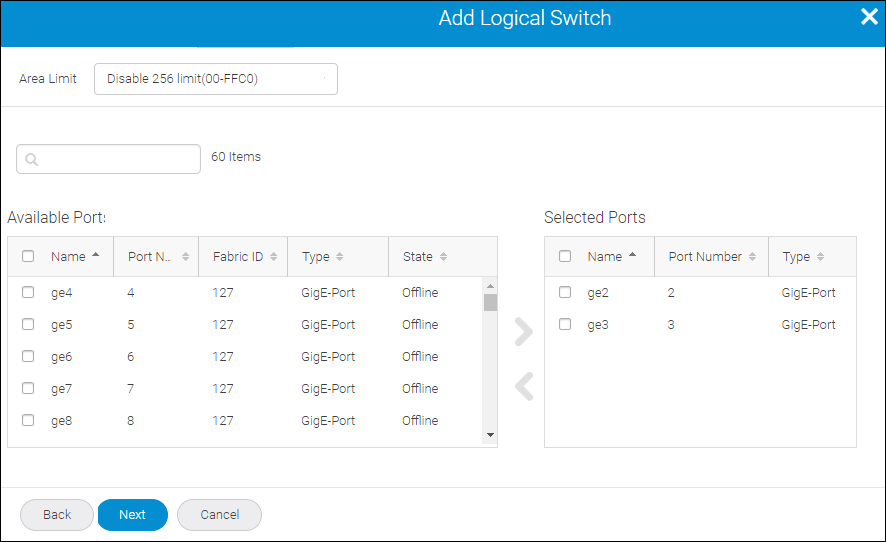
10. Click Next.
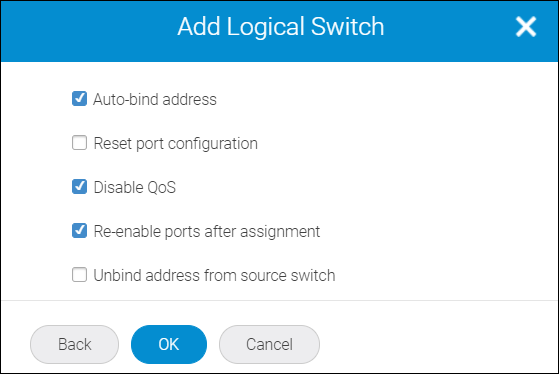
The Add Logical Switch window displays the following operations:
◦ Auto-bind address
◦ Reset port configuration
◦ Disable QoS
◦ Re-enable ports after assignment
◦ Unbind address from source switch
Note: The Auto-bind address checkbox cannot be selected if you create a FICON logical switch. In this scenario, you can bind the address manually. You can manually bind addresses by unchecking the Auto-bind address option and specifying the required port address.
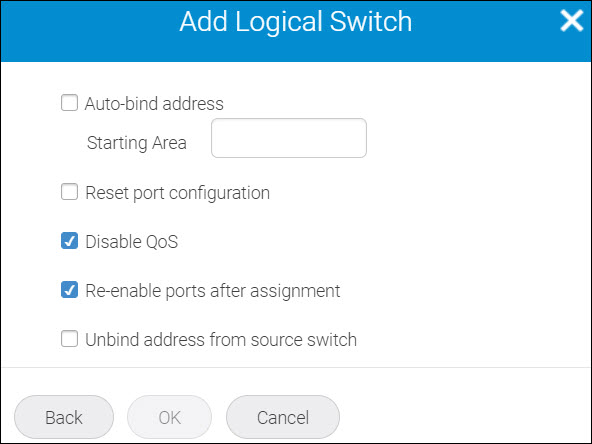
The following table lists the address binding properties and the switch types:
Chassis Type | Template | 256 Disable Limit | Zero Based | Port Based | |||
Auto Bind | Manual Bind (Starting Area ) | Auto Bind | Manual Bind (Starting Area ) | Auto Bind | Manual Bind (Starting Area ) | ||
Switches | Base Switch Template | Yes | — | — | — | — | — |
FICON Template | — | — | — | 00-FF | — | — | |
XISL Template | Yes | — | — | — | — | — | |
Non-XISL Template | Yes | — | — | — | — | — | |
Directors | Base Switch Template | Yes | 7000-FFC0 | Yes | 00-FF | Yes | — |
FICON Template | — | — | — | 00-FF | Yes | — | |
XISL Template | Yes | 7000-FFC0 | Yes | 00-FF | Yes | — | |
Non-XISL Template | Yes | 7000-FFC0 | Yes | 00-FF | Yes | — | |
11. Click OK.
The logical switch is created and can be viewed under Logical Switches option.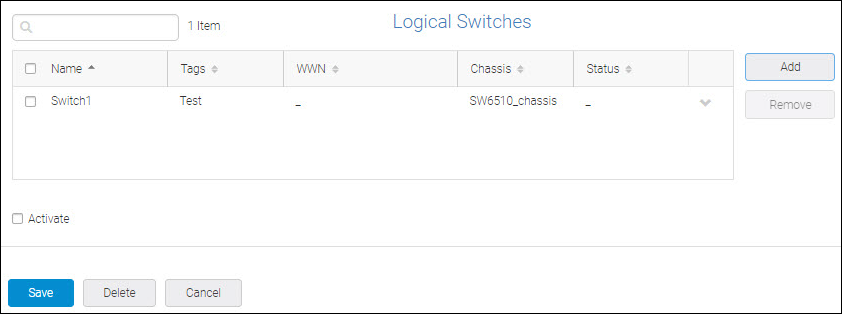
12. Click Save to add the logical switch to the logical fabric.
Parent topic