Adding Custom Fields to a Managed Object
You can add additional columns to the SANnav Inventory table, and populate the columns with customized values. You can then filter the information based on these values.
For example, suppose you want to be able to identify switches by the location of their data center. The following procedure describes how to add and populate a new column, Data Center, for switches.
1. Click the Settings icon (  ), and then select > .
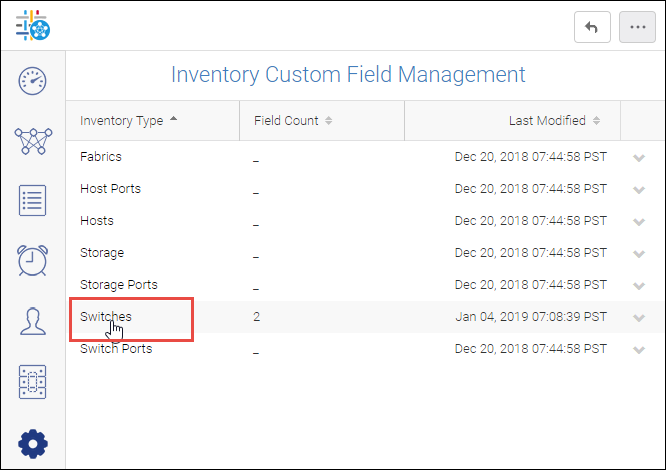
), and then select > .2. In the table, select the type of inventory for which you want to add custom fields.
For this example, select Switches.
3. Type the name of the new column in the empty field.
If the field is already populated, click Add to add a new field. You can add up to 10 custom fields.
Note that in this example, two custom fields, Software Install Date and End Of Support Date, are already defined for switches.
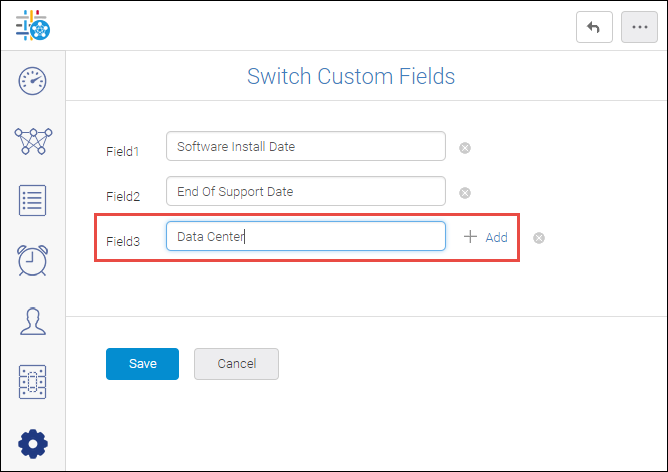
If you want to delete a custom field, click the X next to the field. Be aware, however, that when you delete a custom field, any values that were in this field are also deleted.
4. Click Save.
5. Display the custom inventory columns.
a. Click the Inventory icon (  ), and then select Switches from the drop-down list.
), and then select Switches from the drop-down list.b. Click the hamburger icon (  ) on the right side of the window, and select Columns.
) on the right side of the window, and select Columns.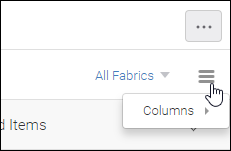
A list of all possible columns displays. User-defined columns are listed at the end.
c. Scroll down the list and select the columns you want to display. Click anywhere outside the list window to close it.
6. Populate the custom inventory fields.
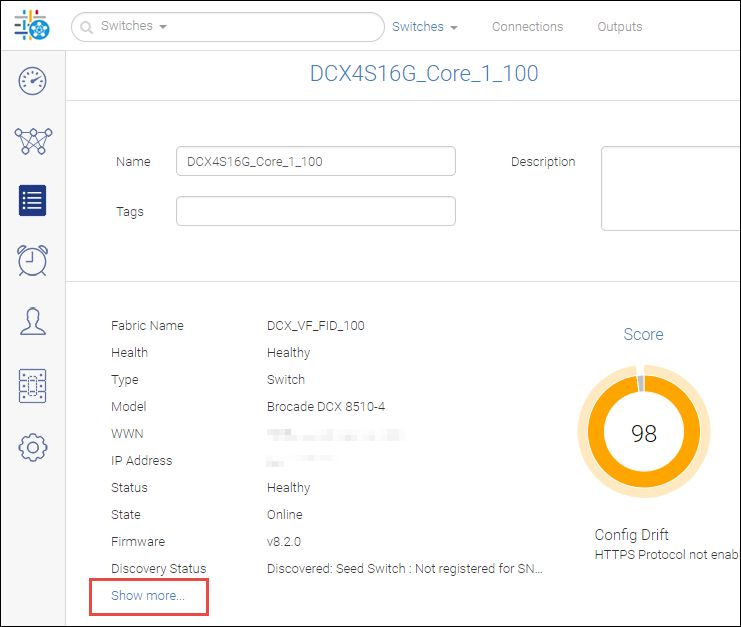
a. On the Inventory page, click the name of the item you want to modify.
For this example, click the name of the switch you want to modify.
The details page displays.
b. Click Show more... to display additional details, including the custom fields.
c. Enter values for the custom fields.
Custom fields are added at the end, so you might need to scroll down to see them.
d. Scroll to the bottom of the window and click Save.
Note: If you leave the window without clicking Save, there is no warning, and your changes are not saved.
The Inventory page displays the custom columns and populated values. You can now use these values in searches and filters of the inventory.
Parent topic