Renaming Switch Ports, Switches, and Fabrics
You can rename switch port, switches, and fabrics individually or in bulk. You can create a naming convention and automatically rename switch ports in bulk, based on their port attributes.
You can rename objects individually, in the details view, by entering a new name in the Name field.
You can rename objects in bulk from the Inventory. The following steps describe how to automatically rename switch ports. The procedure is similar for renaming switches and fabrics, except that you cannot use the automatic function.
1. Click the Inventory icon (  ), and then select Switch Ports from the drop-down list.
), and then select Switch Ports from the drop-down list.2. Click the More button (  ), and select Bulk Edit.
), and select Bulk Edit.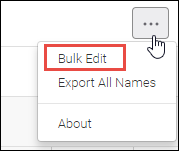
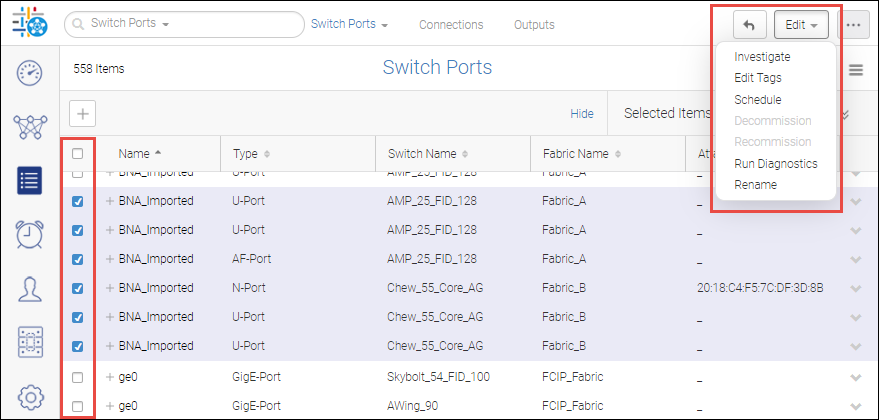
3. Select the ports you want to rename, and click > .
You cannot rename GigE ports. If you have selected any GigE ports, the Rename option is not available.
4. Enter the naming values in the Rename dialog box.
You can select Rename manually to enter names individually. For switch ports, an easier way to generate names is to select Rename automatically, and then select the components that compose the name.
The following example shows how switch port names will be generated using a concatenation of switch name, slot number, and port number, separated by underscores. Note that the slot number applies only to directors. If the port is not on a director, then the slot number component is ignored.
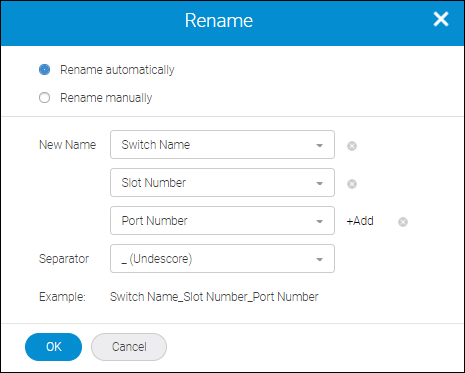
You must ensure that the resulting name follows the rules for Fabric OS switch port names. For example, if you select a custom column as one of the components, and the value in the custom column contains a special character that is not allowed in a switch port name, the name is invalid.
For fabrics and switches, only the manual rename option is available.
5. Click OK.
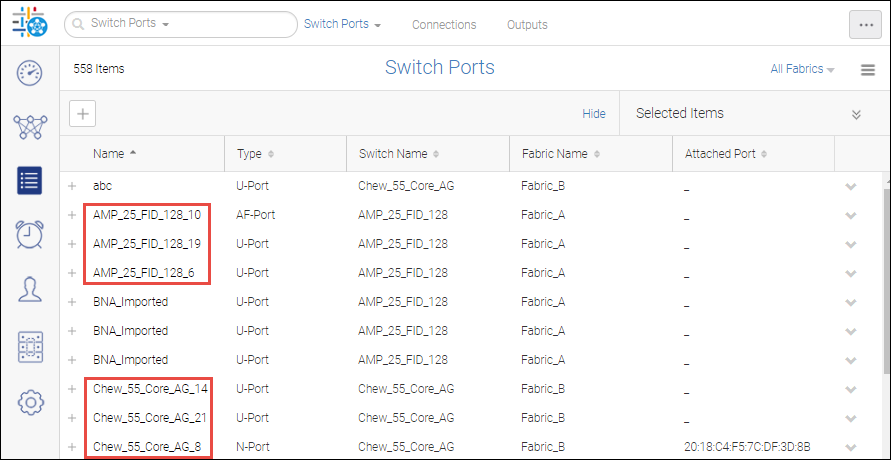
In this example, the ports are on fixed-port switches and not directors, so the slot number is ignored, and the format is SwitchName_PortNumber.
Parent topic