Changing the Seed Switch
If the status of the current seed switch shows that is not recommended as a seed switch, you should change the seed switch.
You might need to change the seed switch for the following reasons:
• The seed switch is no longer running the highest Fabric OS version in the fabric, such as might happen if newer switches join the fabric or the switch firmware version changes on any switch in the fabric.
• The seed switch needs to be taken down for maintenance or replacement.
To change the seed switch, complete the following steps.
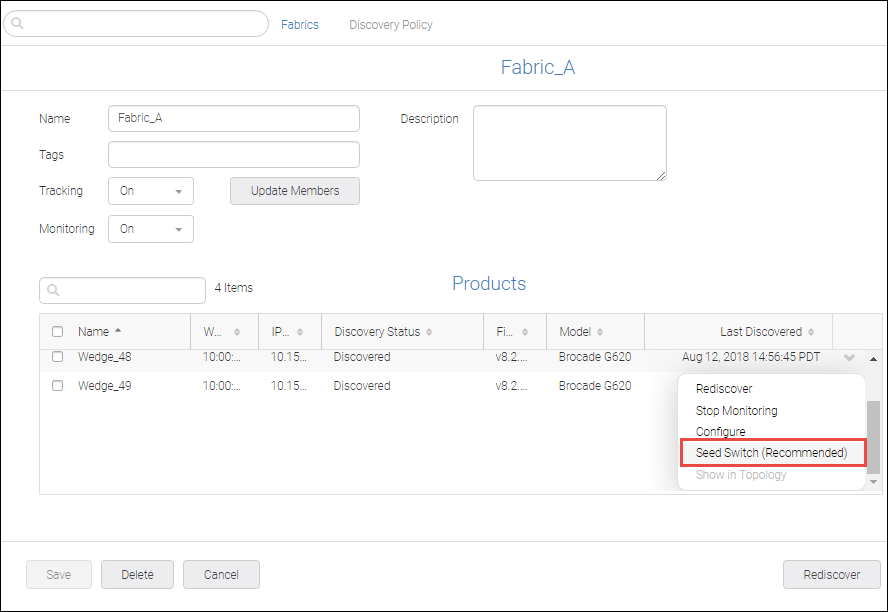
1. Click the Settings icon, and then select > .
The Discovered Fabrics page displays all fabrics that have been discovered.
2. Click the fabric name to open the fabric details page, which displays the list of switches in the fabric.
3. Locate the switch that you want to make the seed switch.
4. Click the down arrow in the rightmost column to open the action menu for the switch, and click Seed Switch (Recommended).
The Seed Switch option is available only if the switch is capable of acting as a seed switch and the switch is not already the seed switch.
The seed switch changes to the new switch, and the switch status updates accordingly.
Parent topic